Using GitHub Pages
For this class, we will be using GitHub Pages to host our code. GitHub offers free hosting for static websites, and using Git allows us to have multiple versions of our work, all backed up in “the cloud”.
GitHub allows us to create one repository named [insert username].github.io. This will be the home page of our website for this class, and will be where we list our names and assignments. Follow the guide on the link above to get it set up.
First Steps
- Create a free GitHub account
- Install Github Desktop
- Make sure you have Sublime Text installed
Creating a New Repo
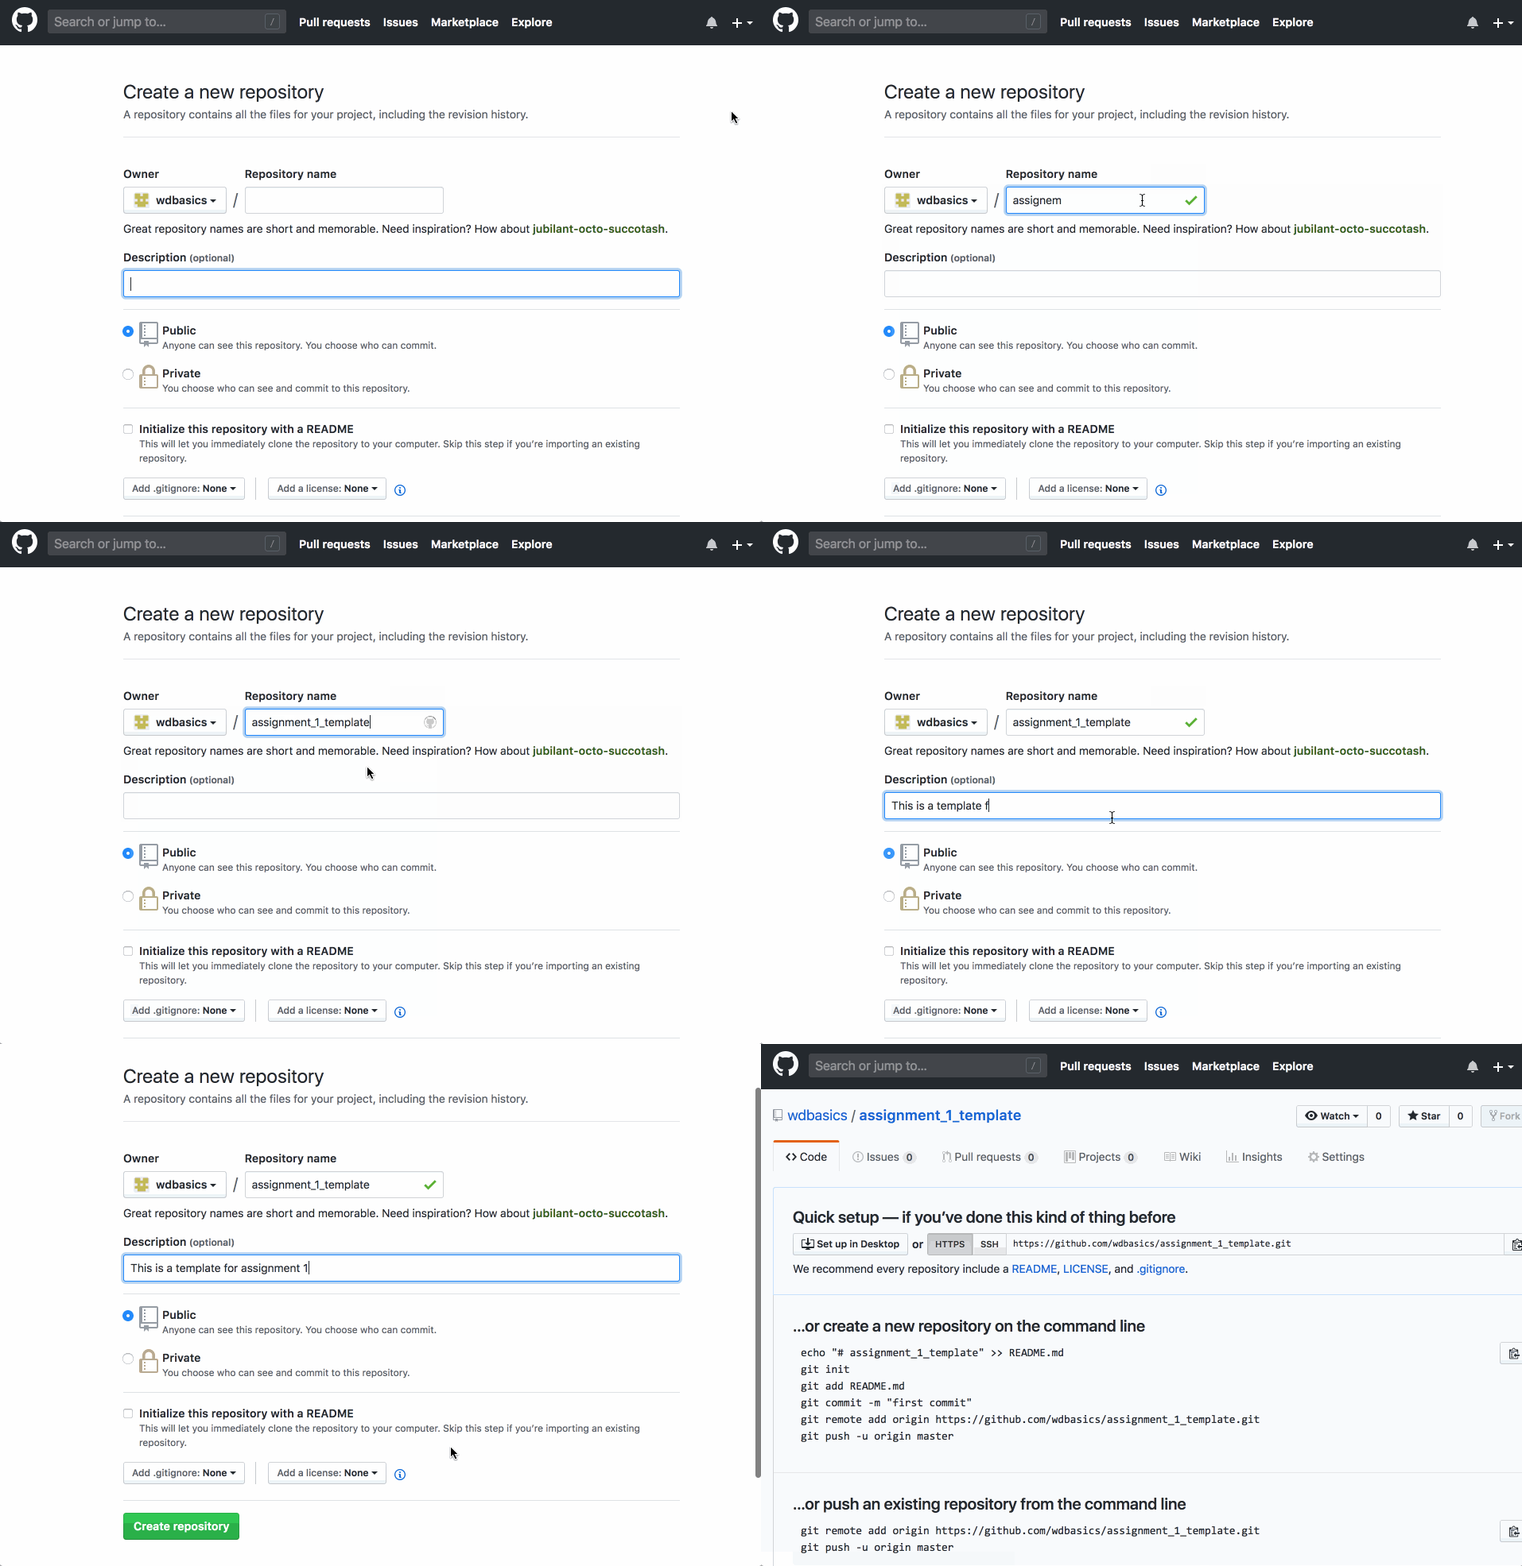
- Navigate to the home page on https://github.com. Click on the “plus” sign on the top right of the page and select “new repository”.

- Name your repository. Keep in mind that this will be the URL to your project. If your repo is named my_repo then your URL will be username.github.io/my_repo. I would recommend not using spaces, capital letters, or special characters such as emoji. Give your repo a description and click “create repository”

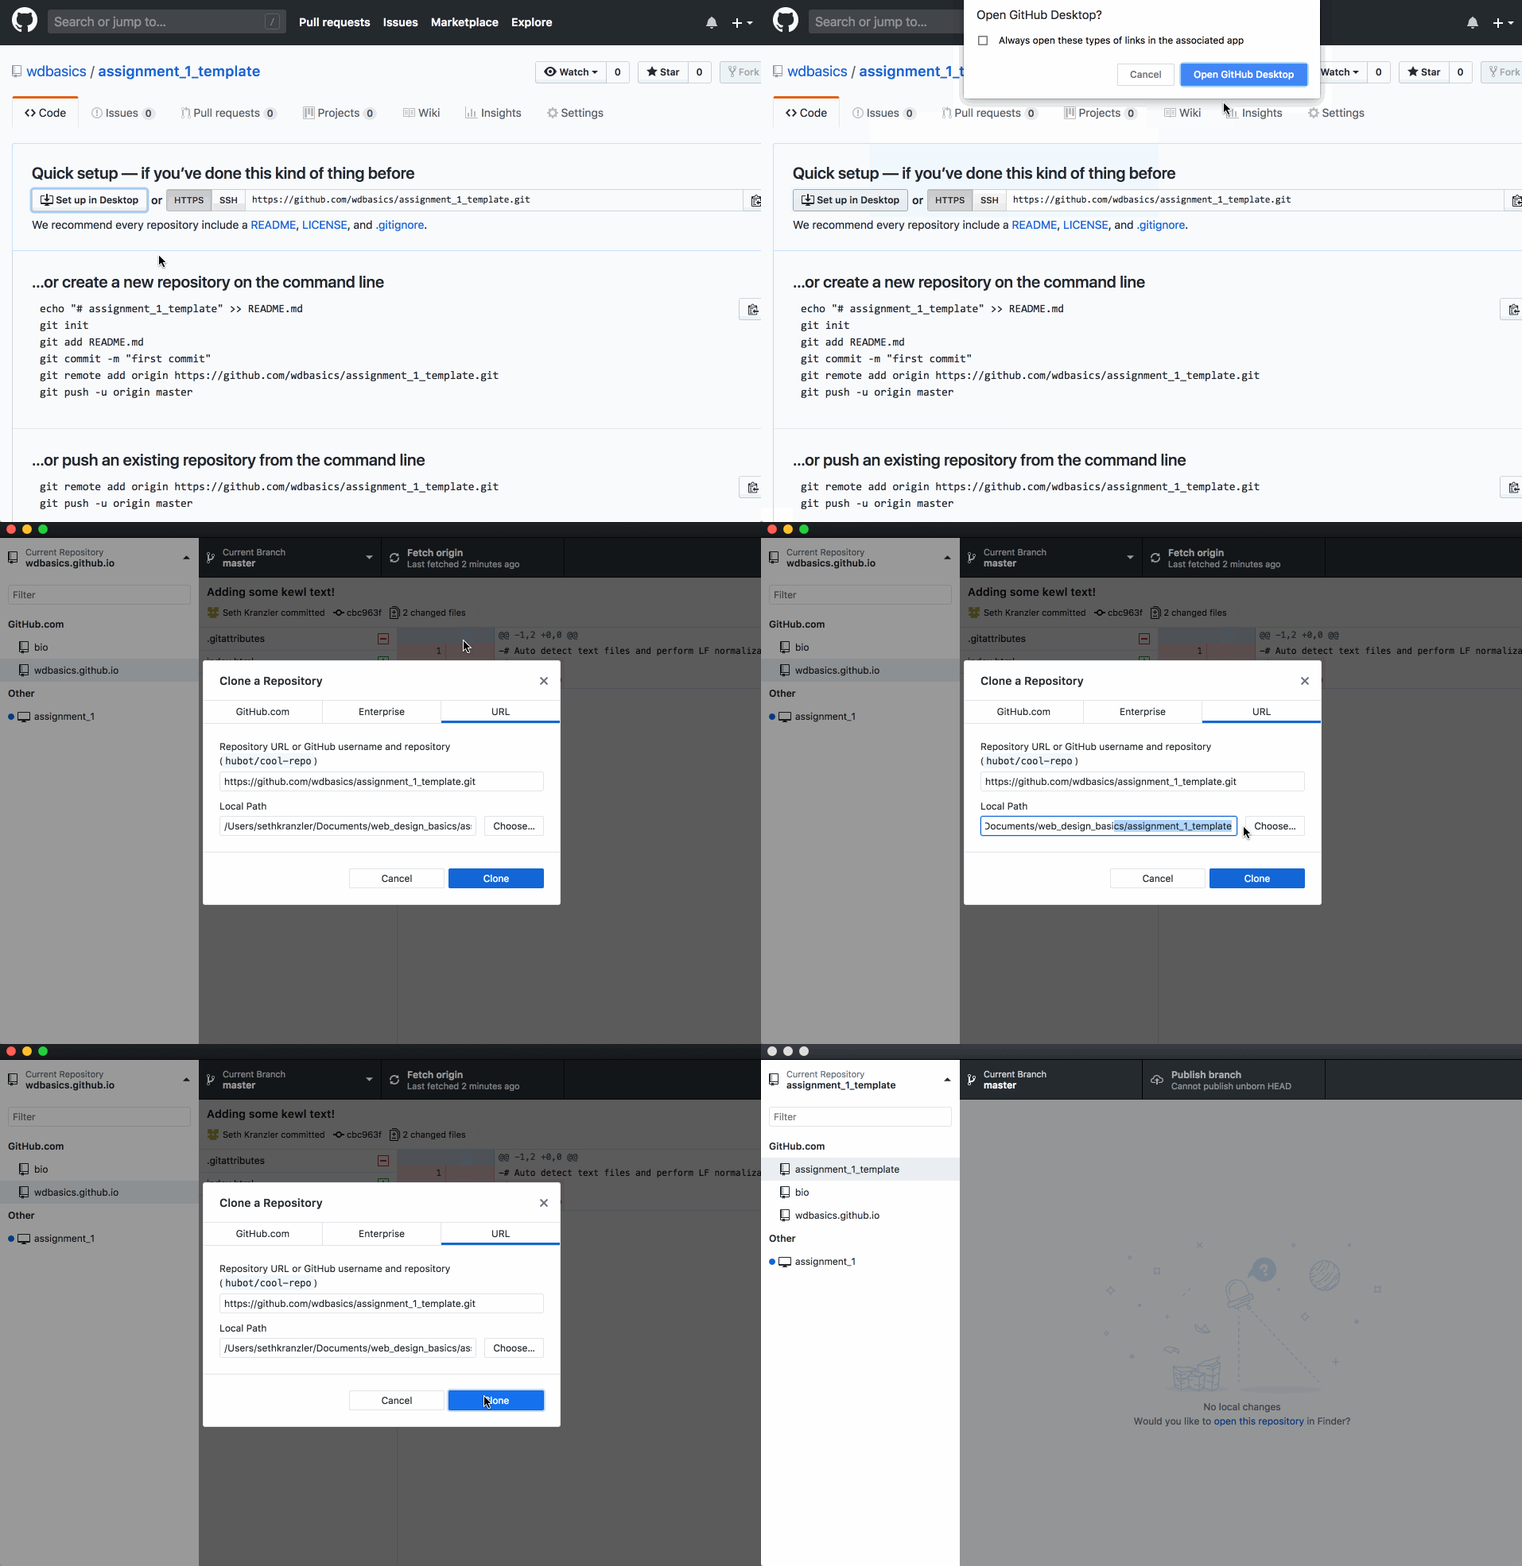
- You will be brought to a page with a “quick setup” option. Click on the button that says “Set up in Desktop”. Allow your browser to open GitHub Desktop. Make sure the repo is saving to your class folder, then click “clone”.

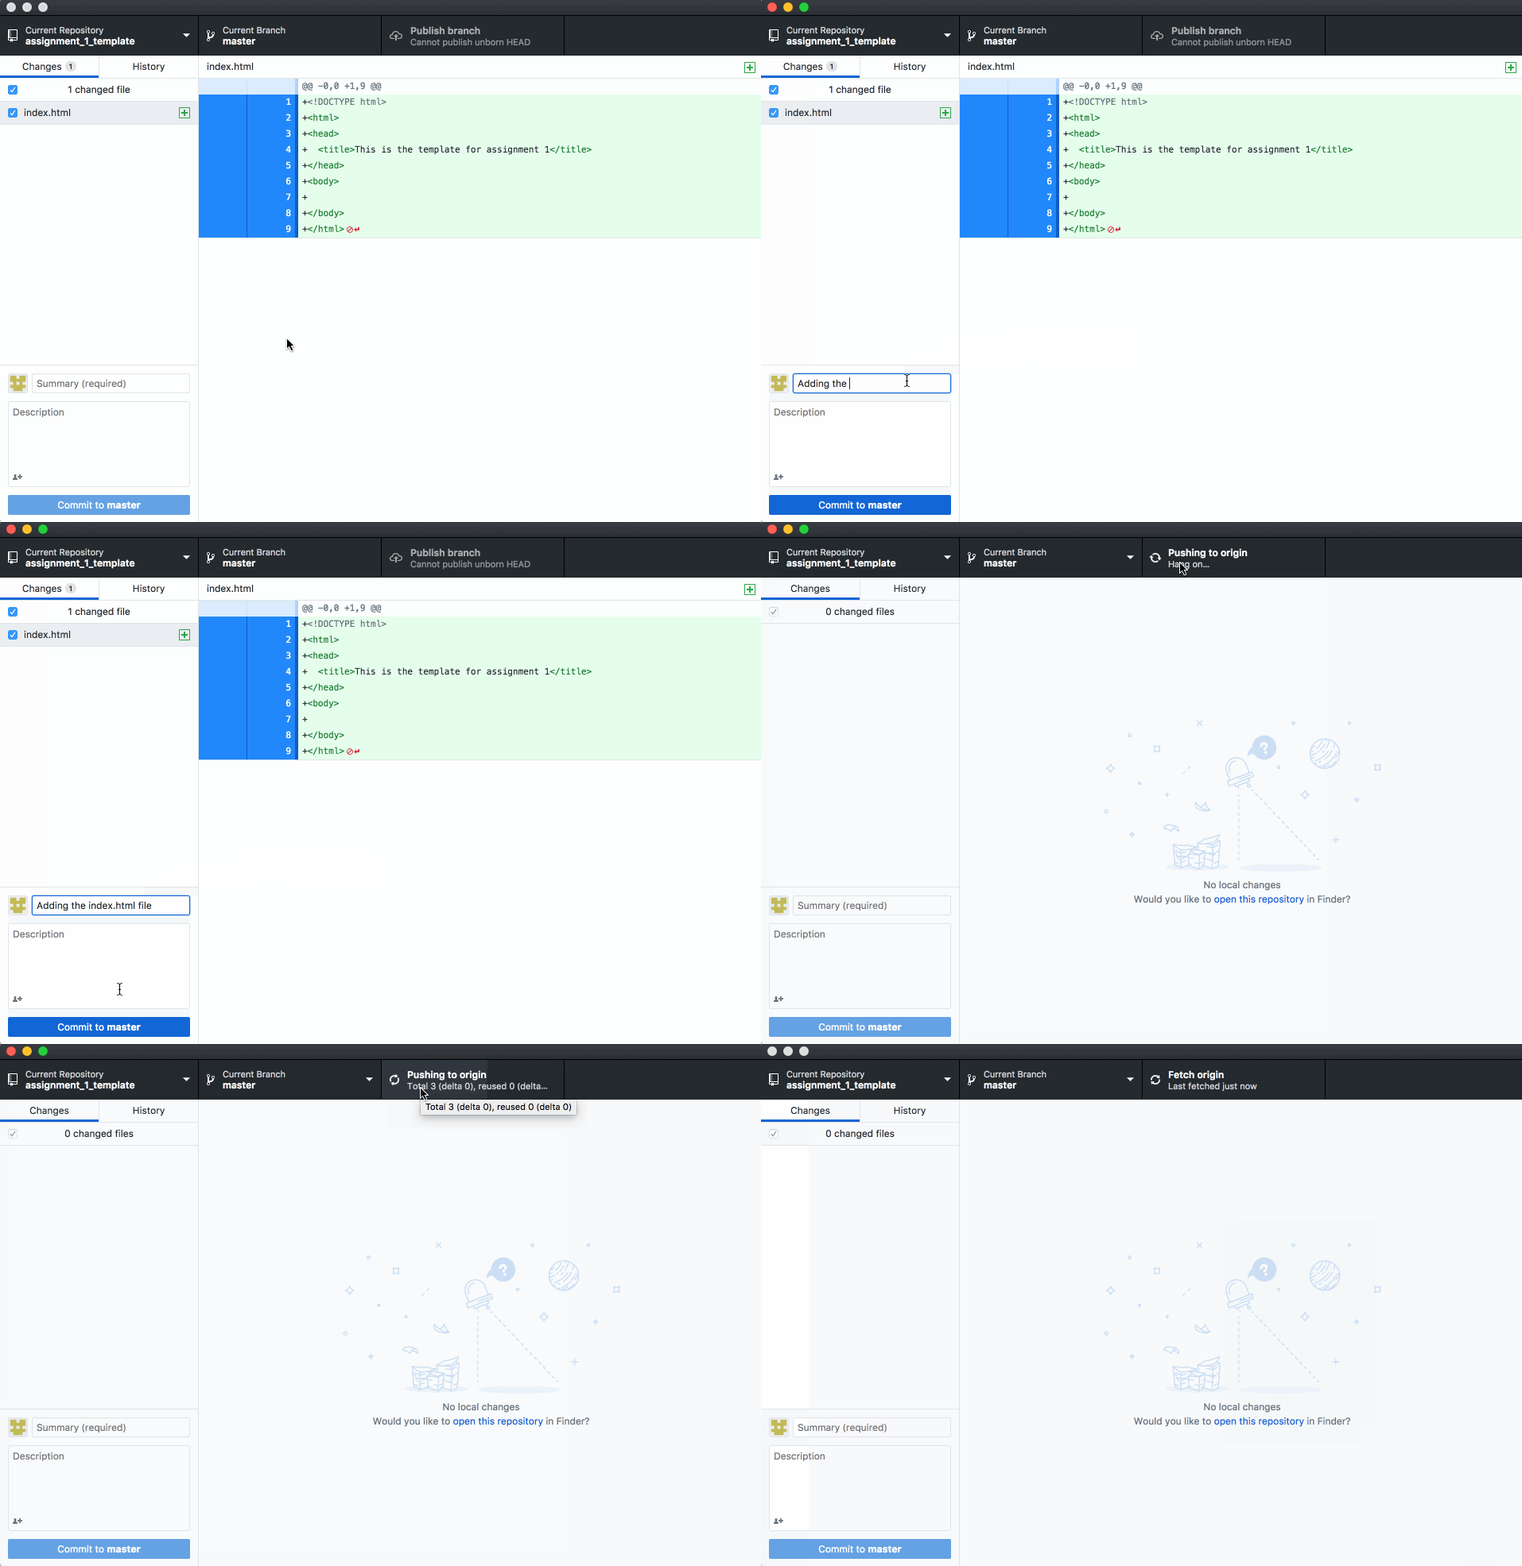
- Create your files in the repository and make the changes you want to make. Return to GitHub Desktop. You should see your changes reflected in the repository. Enter a commit message and click “Commit to Master”, which will push your code to username.github.io/my_repo You will then be able to click “Publish branch”.

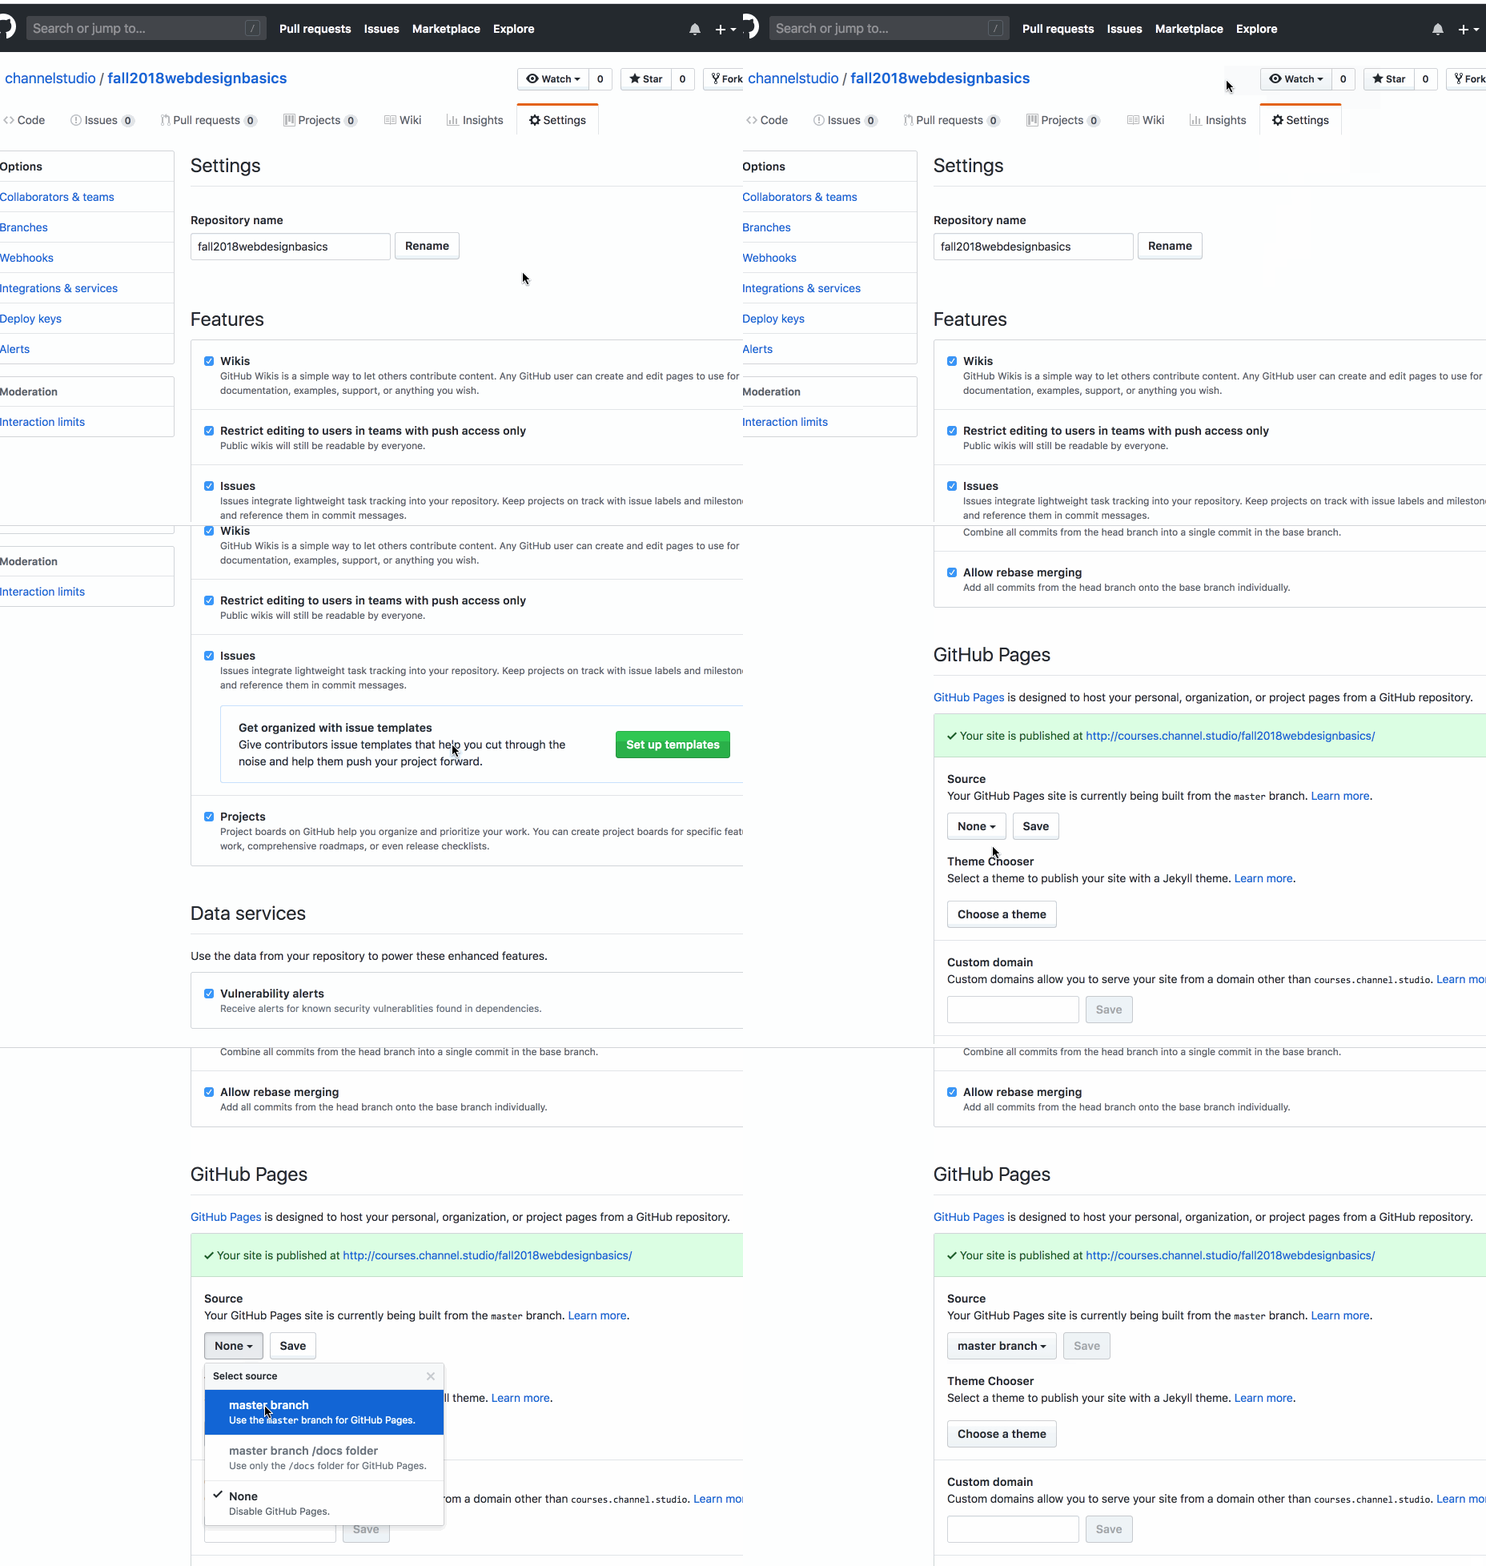
- On github.com, go to your repository setting and scroll down to “GitHub Pages”. Under source, change the dropdown to “master branch” and click save. It may take a few minutes for your site to publish.
